Speech-to-text, also known as automatic speech recognition (ASR), is a technology that converts spoken language into written text. Speech-to-text technology automates transcription, saving time and enhancing accessibility for a wide range of applications. Incorporating speech-to-text functionality into your application can greatly enhance user engagement and accessibility.
In this article, we will walk you through the process of integrating speech-to-text into a Django application using Picovoice's Leopard Speech-to-Text engine.
Note that it is also possible to perform speech-to-text directly in the front-end with Leopard. Check out the Leopard Web Quick Start guide to get started.
1. Prerequisites
Sign up for a free Picovoice Console account. Once you've created an account, copy your AccessKey on the main dashboard.
Also make sure that you have Python and Django installed on your device, and that your version of Django supports your version of Python. You can check if they are installed with the following commands:
2. Create a Django Project
If you don't already have a Django project, start by creating one with the following command:
3. Create a Django App
Within your project, create a new Django app.
In your /myproject/settings.py file, add 'myapp' to the INSTALLED_APPS list.
4. Install the Leopard Python SDK
Install pvleopard:
5. Create a View
Replace the contents of /myapp/views.py with the following code. Make sure to replace ${ACCESS_KEY} with your actual AccessKey.
This view function (transcribe_audio) will receive an audio file sent by a template (we will set this up in the next step), transcribe it using pvleopard, and send the transcript back to the template to be displayed.
Note that Leopard also returns a timestamp and confidence level for every word in the transcript. This will be printed in your terminal.
Inside the /myapp directory, create a /urls.py file and add the following code:
In /myproject/urls.py, add the following line to the urlpatterns list:
Make sure to also import include from django.urls.
6. Create a Template
Inside the /myapp directory, create a /templates directory. Inside this /templates directory, create a transcribe_audio.html HTML file with the following content in the <body> tag:
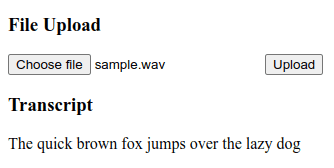
This template simply allows you to send an audio file to your view function (transcribe_audio), which will transcribe the audio and return the transcript to be displayed.
7. Run Project
Start the development server:
Click the link in your terminal to access the development server in your browser. Finally, upload an audio file to view the transcript!

Further Reading
To learn more about Leopard Speech-to-Text, check out the Leopard Speech-to-Text product page or refer to the Leopard Speech-to-Text Python SDK quick start guide.


