Flutter doesn't offer built-in wake word detection, requiring a third-party package. While there are options, most aren't production-ready. They use open-source runtimes like ONNX and PyTorch, which are designed for server inference, or legacy technologies that require days, if not weeks, to train custom wake words. These trade-offs compromise UX and device performance, such as battery life. This tutorial demonstrates how to implement wake word detection in Flutter using Porcupine Wake Word, an enterprise-grade, lightweight engine optimized for production deployments.
Choosing a Wake Word Solution for Flutter
Porcupine is a top choice for Flutter wake word detection because it:
- Runs entirely on-device: audio never leaves the device—no network calls means lower latency and no privacy concerns about sending voice data to external servers.
- Supports custom wake words: easily train your own keywords using the Picovoice Console. Simply type in your keyword and click "Train"—done in seconds.
- Built-in keywords available: if you don't need a custom wake word, you can also skip the training step entirely and use one of the available built-in keywords.
- Is optimized for mobile: lightweight models (typically <10KB per keyword) with minimal CPU usage, ideal for iOS and Android devices.
- Is production-ready: actively maintained, with regular updates and proven reliability in apps with millions of installs.
This guide walks through implementing wake word detection in Flutter using Porcupine Wake Word—a fully on-device solution that runs keyword detection locally. We'll cover installation, custom wake word training, and production implementation that runs on both iOS and Android.
Step-by-Step: Wake Word Detection in Flutter
This tutorial shows you how to add wake word detection to your Flutter app using Porcupine Wake Word. You'll learn to set up offline voice activation that works on both iOS and Android.
Prerequisites for Flutter Wake Word Integration
- Flutter SDK (2.8.1+)
- Android SDK (21+)
- JDK (11+)
- Xcode (13+)
Step 1: Install Flutter Wake Word Dependencies
Add the flutter_voice_processor and porcupine_flutter plugins to your project's pubspec.yaml:
Step 2: Train Your Custom Wake Word Model
Create a Picovoice Console account and train a custom keyword. This lets you create branded wake words like "Hey [YourApp]" instead of generic phrases.
Useful guides:
- Written guide: Choosing a Wake Word
- Video walkthrough: Picovoice Console Tutorial: Porcupine Wake Word
Once you have chosen your keyword, download the keyword files. You will need to download two keyword files—one for Android, and one for iOS. The files will have a .ppn extension.
Step 3: Add Wake Word Files to Your Flutter Project
Place the downloaded keyword files into your project's assets/ folder and reference them in pubspec.yaml:
Using Non-English Wake Words: If you created a non-English keyword, you will also need to add the corresponding model file for the language you chose. Also place the model file into your project's assets/ folder and reference them in pubspec.yaml:
Step 4: Configure Microphone Permissions
iOS Setup
In Info.plist:
Android Setup
In AndroidManifest.xml:
Step 5: Define Wake Word Detection Callback Function
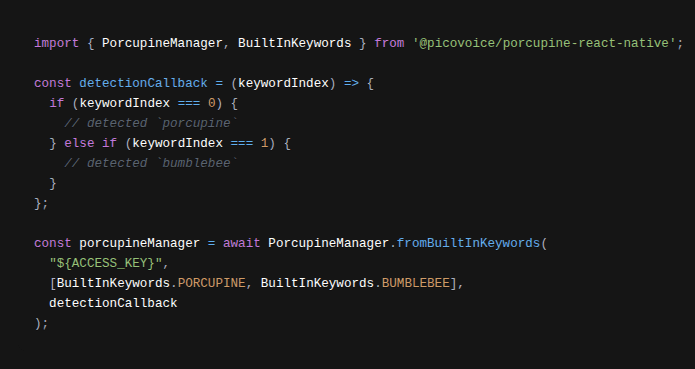
Define a function to handle keyword detection. You can pass in more than one keyword when initializing Porcupine (see next step), and the detection callback function will give you the index of the keyword detected.
Step 6: Initialize the Flutter Wake Word Engine
Copy your AccessKey from the Picovoice Console. The AccessKey is only required for authentication and authorization.
Create an instance of PorcupineManager. Replace {ACCESS_KEY} with your Picovoice AccessKey, keywordPath and modelPath with the correct paths, and pass in your _detectionCallback() function.
Step 7: Start and Stop Wake Word Listening
To start listening for wake words:
To stop listening for wake words:
Step 8: Clean Up Wake Word Resources
Once you no longer need PorcupineManager, release the resources acquired:
Complete Flutter Wake Word Code Example
Below is a fully implemented widget you can add to your project to see Porcupine in action. Replace '{ACCESS_KEY}' with your own AccessKey from Picovoice Console, '{KEYWORD_FILE}' with your keyword file, and '{MODEL_FILE}' with your model file (if applicable).
This is a simplified example but includes all the essential code to get you started. For a complete working app, check out the Porcupine Flutter demo on our GitHub repository.
Optimizing Wake Word Detection Accuracy
To get the best wake word detection results in your Flutter app:
- Choose distinctive wake words: Avoid common phrases that might trigger false positives
- Test in realistic conditions: Test with background noise, different accents, and varying distances
- Use sensitivity tuning: Adjust Porcupine's sensitivity parameter to balance accuracy and responsiveness
- Handle multiple keywords: Implement different actions for different wake words in the same app
Advanced Flutter Wake Word Integration
Using Multiple Wake Words Simultaneously
You can detect multiple wake words at once by passing an array of keyword paths:
Integrating Wake Word with Voice Commands
Combine wake word detection with Rhino Speech-to-Intent to create a complete voice interface. After detecting a wake word, activate speech recognition to process the user's command.
Flutter Wake Word Resources & Documentation
This tutorial uses the following packages:
- porcupine_flutter - Official Porcupine Flutter package
- flutter_voice_processor - Audio processing utilities
Additional documentation & resources:
Start BuildingConclusion: Building Production-Ready Flutter Wake Word Apps
With Porcupine and Flutter, you can build offline voice-activated applications that work reliably on both Android and iOS. Whether you're building accessibility tools, hands-free interfaces, or voice-controlled hardware, this guide gives you everything you need to integrate accurate wake-word detection into your app.
Unlike many alternatives, Porcupine provides a production-ready, actively maintained solution with custom wake word training, multi-language support, and proven mobile performance.
Frequently Asked Questions About Flutter Wake Word Detection
Yes, Porcupine supports multiple keywords. You just need to pass an array of keyword paths when initializing Porcupine. This allows you to create different voice triggers for different actions within your app.
Porcupine runs keyword detection entirely on-device. Internet is only required for licensing and usage tracking. This makes it ideal for privacy-sensitive applications and scenarios with unreliable connectivity.
Yes, Porcupine supports multiple languages for wake word detection. Languages include English, French, German, Italian, Japanese, Korean, Chinese, Portuguese, and Spanish.
The best wake word library for Flutter depends on your app's needs, but porcupine_flutter is a popular choice for its accurate, offline, and privacy-friendly detection, support for custom keywords, cross-platform compatibility, and easy Flutter integration. Unlike many alternatives, Porcupine is actively maintained and optimized for production mobile apps.
Porcupine achieves high accuracy rates (>97%) with low false-positive rates. Accuracy depends on factors like wake word choice, pronunciation variability, and environmental noise.
Yes, one of Porcupine's key advantages is custom wake word training. You can create branded wake words like "Hey MyApp" or "Activate MyService" through the Picovoice Console, giving your app a unique voice interface that matches your brand.


