🚀 Best-in-class Voice AI!
Build compliant and low-latency AI apps running within web browsers without sending user data to 3rd party servers.
Start Free Speaker Recognition is the process of analyzing unique voice characteristics to identify and verify individuals, enabling applications such as voice authentication, speaker-based personalization, and speaker spotting.
A major challenge for many Speaker Recognition applications is the high latency of cloud-based services, which leads to poor user experience. Fortunately, Picovoice's Eagle Speaker Recognition provides on-device Speaker Recognition, effectively bypassing the issues posed by cloud usage without sacrificing accuracy.
In just a few lines of code, you can start performing Speaker Recognition with a microphone using the Eagle Speaker Recognition Web SDK. Let’s get started!
Install Eagle Speaker Recognition Web SDK Install the Eagle Speaker Recognition Web SDK using npm:
npm install @picovoice/eagle-web
Sign up for Picovoice Console Next, create a Picovoice Console account, and copy your AccessKey from the main dashboard. Creating an account is free, and no credit card is required!
Usage Eagle Speaker Recognition Model Add the Eagle Speaker Recognition model to the project by:
Either copying the model file to the project's public directory: cp ${EAGLE_PARAMS_PATH} ${PUBLIC_DIRECTORY}/${EAGLE_PARAMS}
(or)
Create a base64 string of the model using the pvbase64 script included in the package: npx pvbase64 -i ${EAGLE_PARAMS_PATH} -o ${OUTPUT_DIRECTORY}/${MODEL_NAME}.js
Create an object containing the Eagle model options:
import base64model from '${OUTPUT_DIRECTORY}/${MODEL_NAME}.js'
const eagleModel = {
publicPath : '${PUBLIC_DIRECTORY}/${EAGLE_PARAMS}' ,
base64 : base64model ,
}
Speaker Enrollment Initialize an Eagle Profiler with the eagleModel variable containing the model options:
import { EagleProfilerWorker } from "@picovoice/eagle-web" ;
const eagleProfiler = await EagleProfilerWorker . create (
"${ACCESS_KEY}" ,
eagleModel
) ;
EagleWorker uses web workers to process audio data. Web workers might not be supported (i.e. Firefox private mode). In this case, use Eagle instead, which uses the main thread to process audio data.
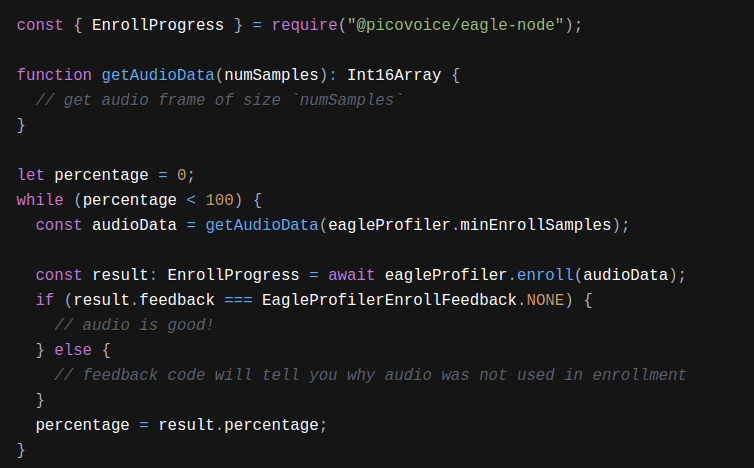
Enroll speakers The .enroll() function takes in frames of audio and provides feedback on the audio quality and Enrollment percentage. Use the percentage value to determine when Enrollment is completed and another speaker can be enrolled:
import {
EagleProfilerEnrollResult ,
EagleProfilerEnrollFeedback ,
} from "@picovoice/eagle-web" ;
function getAudioData ( numSamples ) : Int16Array {
}
let percentage = 0 ;
while ( percentage < 100 ) {
const audioData = getAudioData ( eagleProfiler . minEnrollSamples ) ;
const result : EagleProfilerEnrollResult = await eagleProfiler . enroll ( audioData ) ;
switch ( result . feedback ) {
case EagleProfilerEnrollFeedback . AUDIO_OK :
case EagleProfilerEnrollFeedback . AUDIO_TOO_SHORT :
case EagleProfilerEnrollFeedback . UNKNOWN_SPEAKER :
case EagleProfilerEnrollFeedback . NO_VOICE_FOUND :
case EagleProfilerEnrollFeedback . QUALITY_ISSUE :
}
percentage = result . percentage ;
}
Once Enrollment reaches 100%, export the speaker profile to use in the next step, Speaker Recognition:
const speakerProfile = eagleProfiler . export ( )
Profiles can be made for additional users by calling the .reset() function on the EagleProfiler, and repeating the .enroll() step.
Once profiles have been created for all speakers, make sure to clean up used resources:
Speaker Recognition Initialize an Eagle Profiler with the same eagleModel described above as well as the speaker profile created by the Speaker Enrollment step:
import { EagleWorker } from "@picovoice/eagle-web" ;
const eagle = await EagleWorker . create (
"${ACCESS_KEY}" ,
eagleModel ,
speakerProfile
) ;
If you have multiple speaker profiles created, simply pass in an array of your speaker profiles instead.
To perform speaker recognition, pass audio frames into the eagle.process() function, and it will return the speaker scores:
while ( true ) {
const audioData = getAudioData ( eagle . frameLength ) ;
const scores : number [ ] = await eagle . process ( audioData ) ;
}
When finished, make sure to clean up used resources:
Putting It All Together All that is left is to wire up the audio recording. This example uses WebVoiceProcessor
to record audio.
Install web-voice-processor using npm:
npm install @picovoice/web-voice-processor
The following code snippet records audio and performs speaker recognition on the recorded audio:
import { EagleProfilerWorker , EagleWorker } from "@picovoice/eagle-web" ;
import { WebVoiceProcessor } from "@picovoice/web-voice-processor" ;
const eagleModel = { publicPath : '${PUBLIC_DIRECTORY}/${EAGLE_PARAMS}' }
const speakerProfiles = [ ] ;
let eagleProfiler = null ;
const startProfiler = async ( ) => {
eagleProfiler = await EagleProfilerWorker . create (
"${ACCESS_KEY}" ,
eagleModel ) ;
}
const startEnrollment = async ( ) => {
if ( eagleProfiler === null ) return ;
let audioData = [ ] ;
const micEnrollEngine = {
onmessage : async ( event ) => {
switch ( event . data . command ) {
case "process" :
audioData . push ( event . data . inputFrame ) ;
if ( audioData . length * 512 >= eagleProfiler . minEnrollSamples ) {
let result ;
const frames = new Int16Array ( audioData . length * 512 ) ;
for ( let i = 0 ; i < audioData . length ; i ++ ) {
frames . set ( audioData [ i ] , i * 512 ) ;
}
audioData = [ ] ;
result = await eagleProfiler . enroll ( frames ) ;
console . log ( ` Progress: ${ result . percentage } ` )
if ( result . percentage === 100 ) {
await WebVoiceProcessor . unsubscribe ( micEnrollEngine ) ;
const profile = await eagleProfiler . export ( ) ;
speakerProfiles . push ( profile ) ;
console . log ( "Enrollment complete!" ) ;
}
}
break ;
}
}
}
await WebVoiceProcessor . subscribe ( micEnrollEngine ) ;
}
const cleanupProfiler = ( ) => eagleProfiler . release ( ) ;
let eagle ;
const startEagle = async ( ) => {
eagle = await EagleWorker . create (
"${ACCESS_KEY}" ,
eagleModel ,
speakerProfiles
) ;
}
const micTestEngine = {
onmessage : async ( event : MessageEvent ) => {
switch ( event . data . command ) {
case "process" :
const scores = await eagle . process ( event . data . inputFrame )
console . log ( scores )
break
}
}
}
const startTesting = async ( ) => {
await WebVoiceProcessor . subscribe ( micTestEngine ) ;
}
const stopTesting = async ( ) => {
await WebVoiceProcessor . unsubscribe ( micTestEngine ) ;
}
const cleanup = ( ) => eagle . release ( ) ;
Next Steps For a complete working project, take a look at the Eagle Speaker Recognition Web Demo . You can also view the Eagle Speaker Recognition Web API docs for details on the package.
YouTube Tutorial


