Picovoice Console Tutorial: Designing a Drive-Thru with Edge Voice AI
Introduction
Skill Level
- No coding is required
- No specialized language, audio, or speech expertise is needed
- No machine learning knowledge needed
In this tutorial, we’re designing a Voice User Interface for a drive-thru that will let us order food, using the Picovoice Console. The Voice AI works entirely offline, and runs on edge devices—even those with limited resources, such as microcontrollers.
The underlying technology is Picovoice Rhino, our Speech-to-Intent engine. Speech-to-Intent extracts intent directly from spoken utterances—without the error-prone and expensive Speech-to-Text intermediate step. This allows for dramatically better accuracy and efficiency.
The Picovoice Console platform lets you design and build the voice user interface, test it in-browser as you iterate, then train to run offline on one (or more) of our supported platforms.
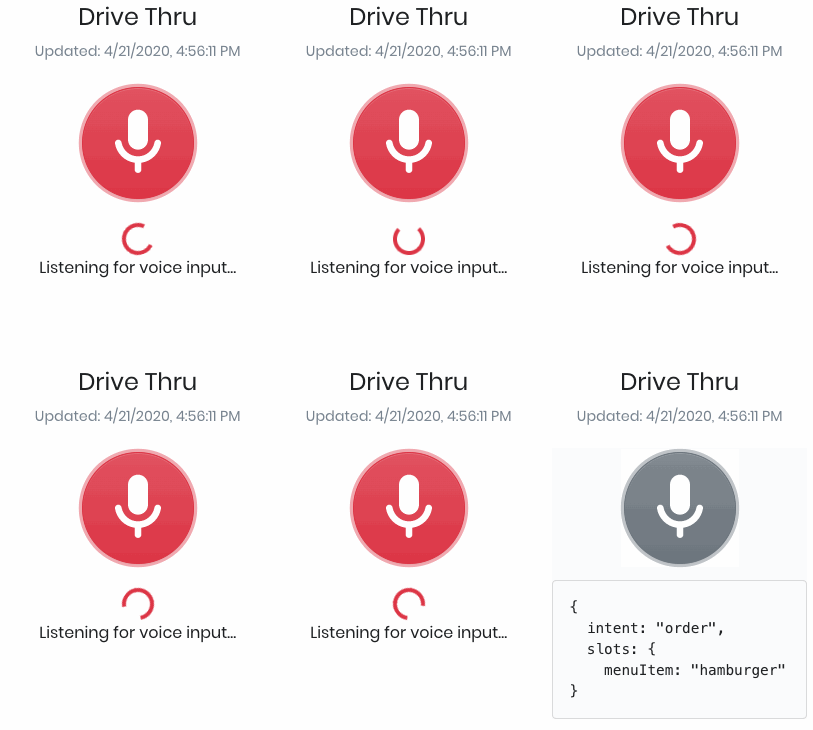
Prerequisites
Equipment
- A modern web browser
- A working microphone
Picovoice Console Account
Before we begin, you will need a Picovoice Console account. Personal accounts are available for free, and Enterprise accounts are available to start with a free 30-day trial.
Video Tutorial
Creating a Context
Login to the Picovoice Console and go to the Speech-To-Intent page.
Create a new Speech-to-Intent context by typing in a name in the box. Let’s call ours “Drive Thru”. Leave the template dropdown to “Empty”. Click “Create Context” and you’ll see the new context appear in the list below. When it's loaded, click the context name to go to the context editor.
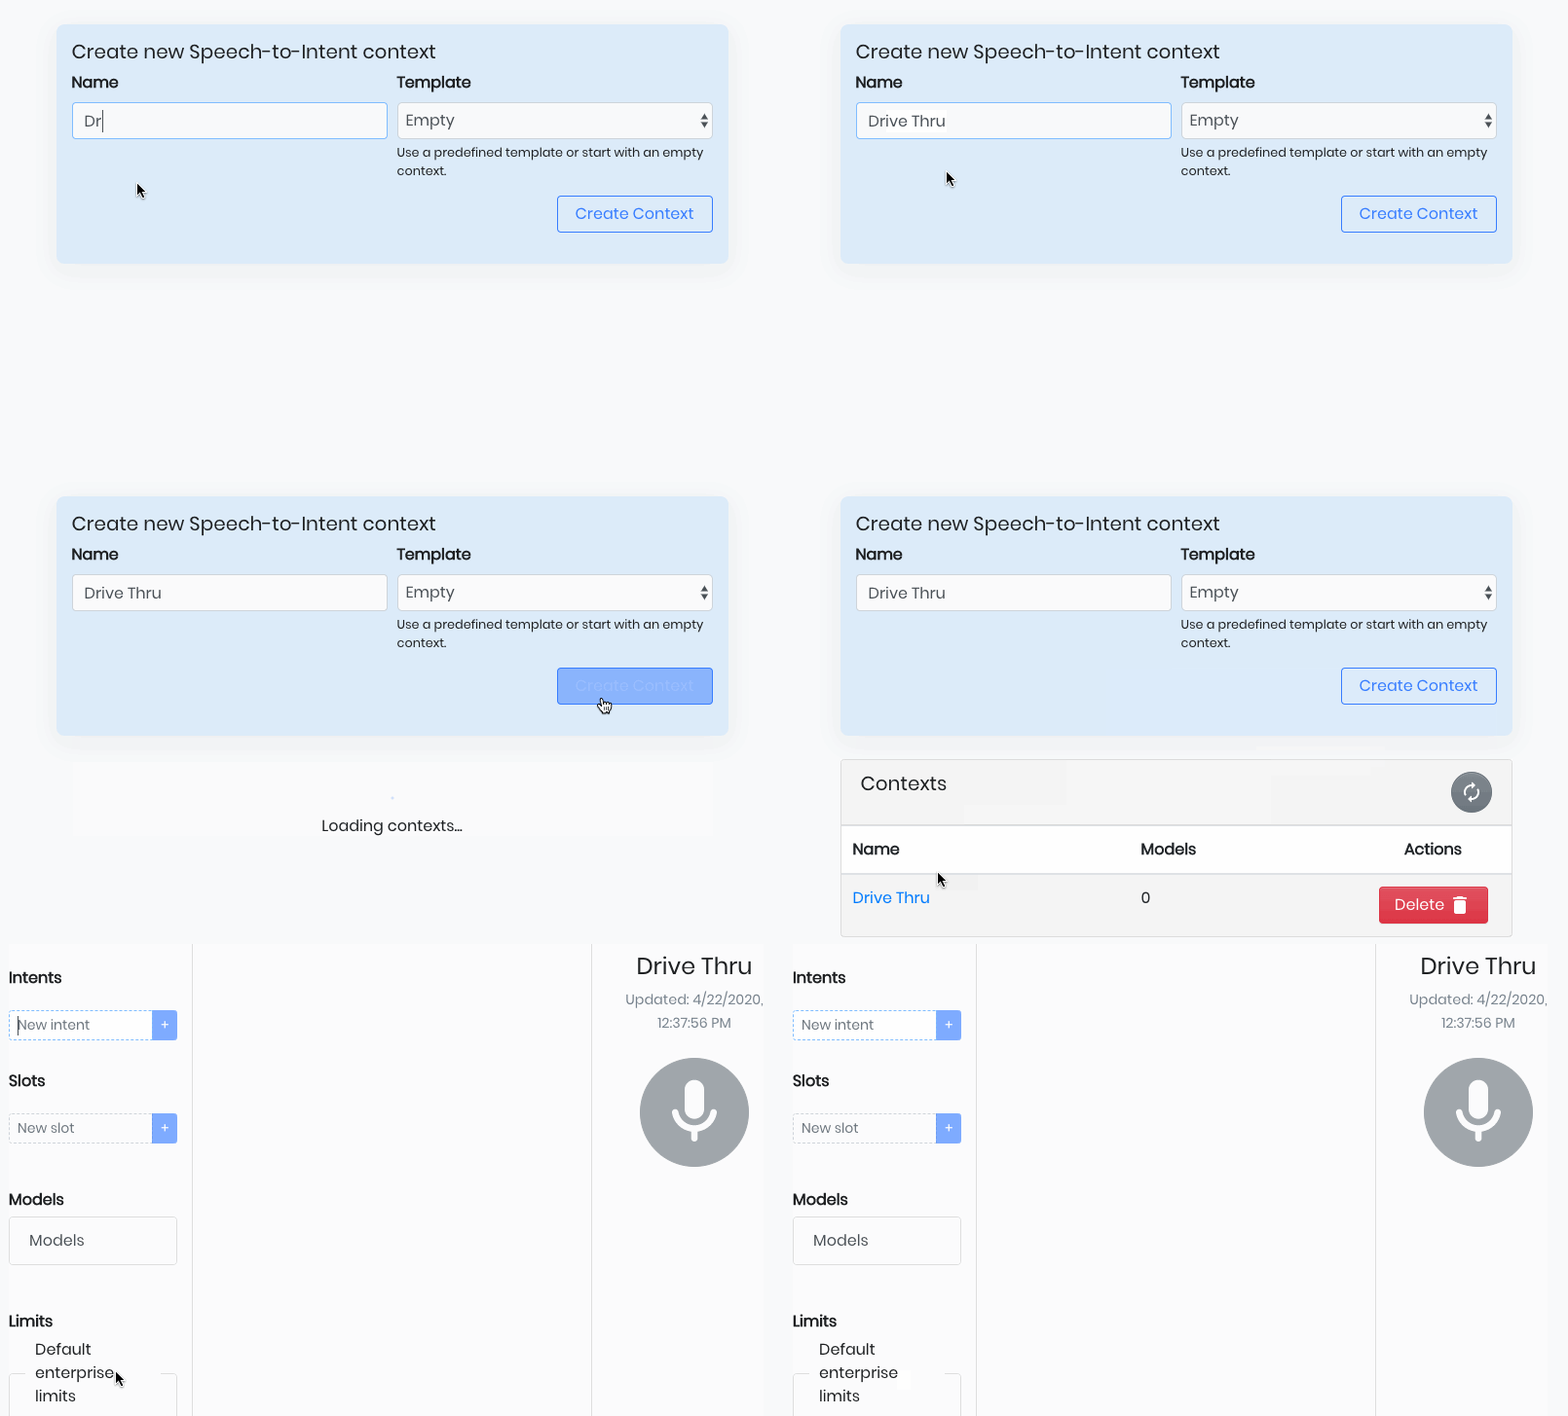
From the context editor, you can design, test, and train the context. When model training completes, a model file that can be used with the Picovoice Rhino SDK on the target platform will be ready to download.
Creating the first intent
To get started, create your first intent by using the widget on the left column of the page. Our primary intent will be “order”.
Type the name “order” in the New intent box and press enter (or click the ‘+’) button.
Press the new “order” button to see your intent. Here we can see the list of expressions (currently empty). Any expression that is typed here will indicate that the “order” intent has occurred.

Adding expressions to the intent
Expressions capture all of the ways we expect a user to express an intent.
Define the first expression, i’d like to order, by typing it into the box. Press enter (or click the ‘’+” button) to add the expression.
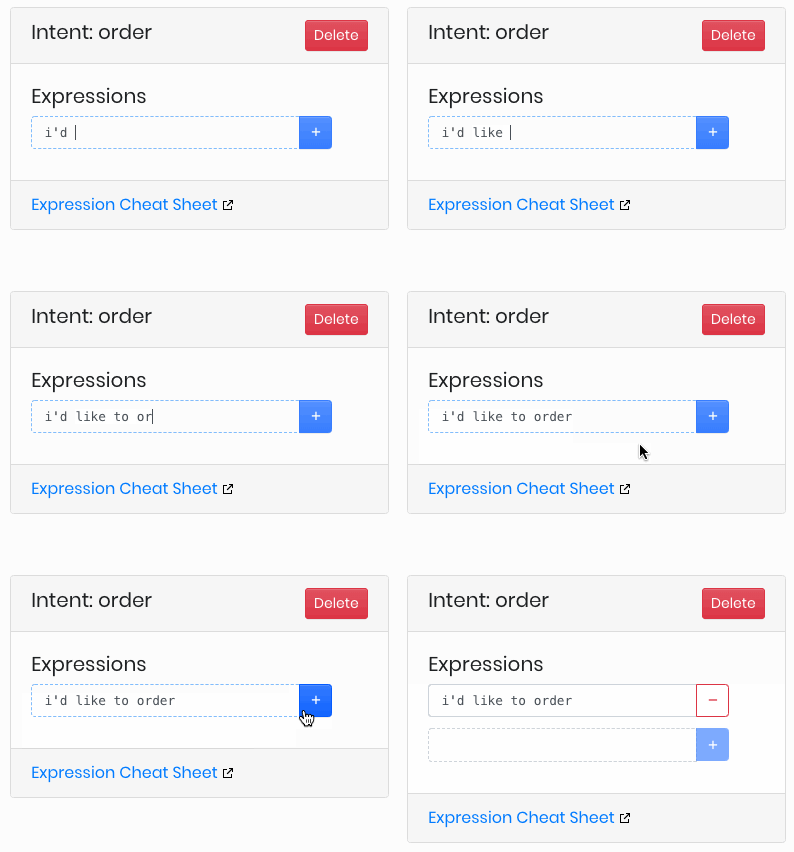
When this exact expression is detected, the 'order' intent will be inferred.
Use the Microphone to test the context
On the right side column, there is a large microphone button. Pressing this button will let us try out our context and see what is returned by Rhino.
The context needs to be saved and some processing must be done to prepare it before it is ready to respond to voice. Pressing the microphone button will trigger both of these events and then prompt you to speak.
When you see the “Listening for voice input…” prompt, say: "I'd like to order".
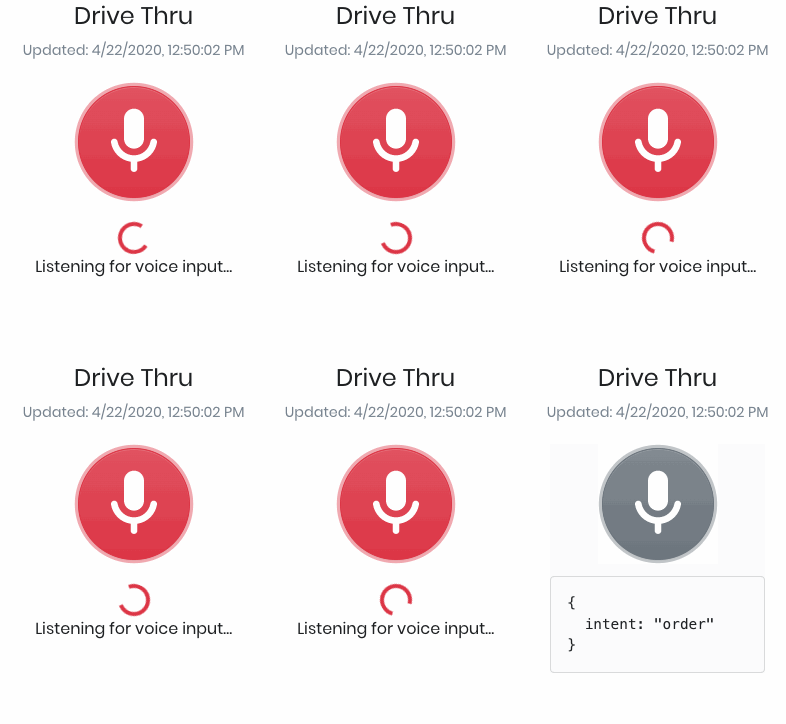
We can see that our expression was detected and the intent “order” was returned.
Try the microphone again, but this time deliberately say something shouldn’t match: “tell me a joke”.
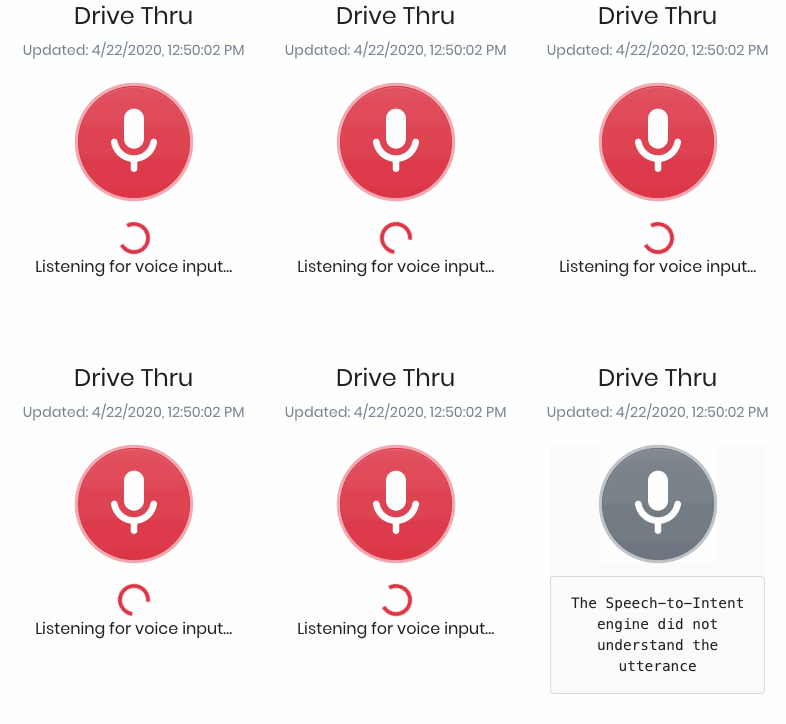
Rhino will report that it did not understand, because it only understands the single expression that you have defined. By focusing on a domain, and not attempting to understand all possible phrases in the spoken language, Speech-to-Intent is able to achieve dramatic accuracy and efficiency improvements over a traditional Speech-to-Text approach.
All anticipated variations in speech within the Drive Thru context need to be explicitly captured by expressions. Thankfully, there’s syntax that makes it convenient to describe these permutations without needing extensive repetition: Speech-to-Intent Expression Syntax Cheat Sheet.
Using slots to capture variables within utterances
Capturing the intent to order is a start, but it’s somewhat obvious if they arrived in their car that they want to order. The interesting part is capturing their specific order from their utterances. To accomplish this, we use slots.
Update the expression to use the built in two-digit numerical slot by appending $pv.SingleDigitInteger:orderNumber. Press enter (or click the checkbox) to update the expression.
When the dollar sign is entered in an expression, the Console will automatically open a pop-up menu with all available slot suggestions. Keep typing to narrow the options. Pressing enter while the pop-up menu is open will autocomplete the selected slot.
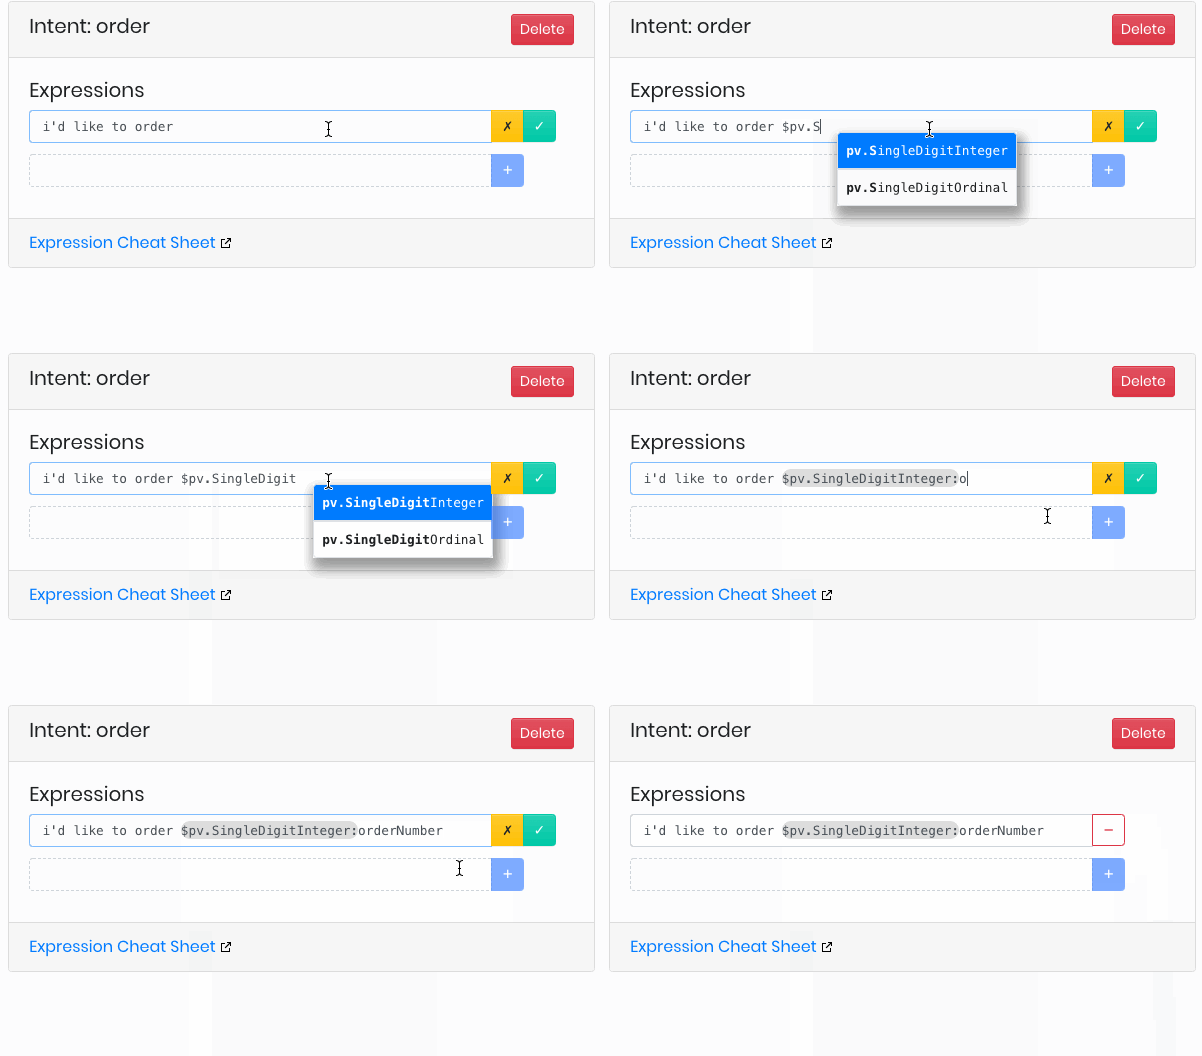
Let’s break down what’s going on here:
The '$' symbol indicates a slot type. We are using a slot that is built-in to Rhino, called 'pv.SingleDigitInteger'. The 'pv.' prefix distinguishes built-in slots from custom slots (coming up in the next section).
The ':' symbol indicates that 'orderNumber' is the name of the slot variable. This is what we will use to store the specific value when the phrase is uttered (to be more specific, it's the name of the key in the dictionary that Rhino returns). The variable names are not important, provided they are unique within the same expression.
Press the microphone button. When prompted for voice input, say: “I’d like to order number six”.
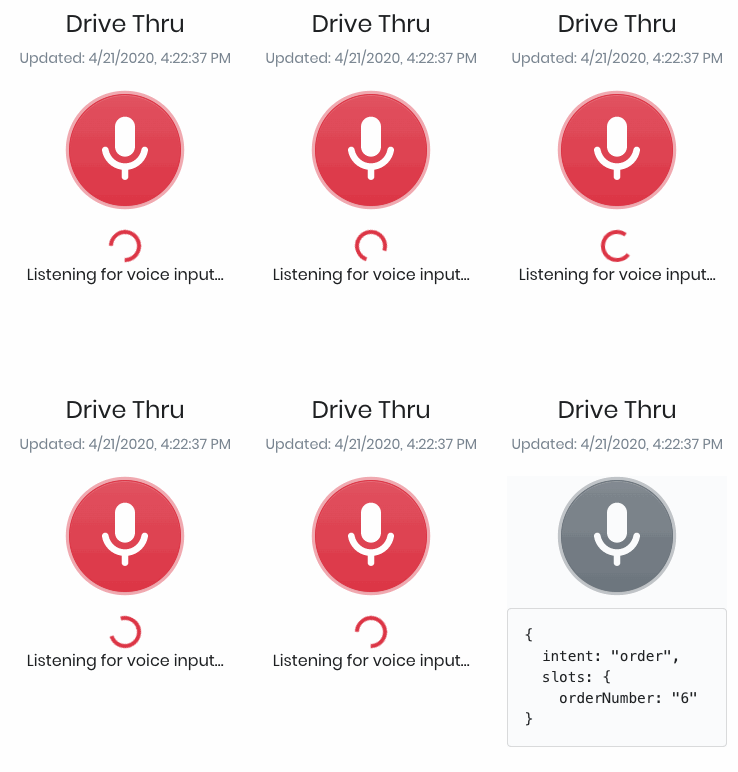
The specific value has been extracted from the utterance, along with the overall intent: “order.” This gives us the required information to understand the order.
Making a custom slot
Order numbers are simple to implement, but typically people will want to order more naturally, by asking for the items on the menu directly. To accommodate this, we can create a custom slot for this context that handles our Drive Thru menu.
On the left column of the editor, there is a section for Slots. Create a new slot and name it 'menu' by typing it in the 'New slot' box and pressing enter (or pressing the ‘+’ button).
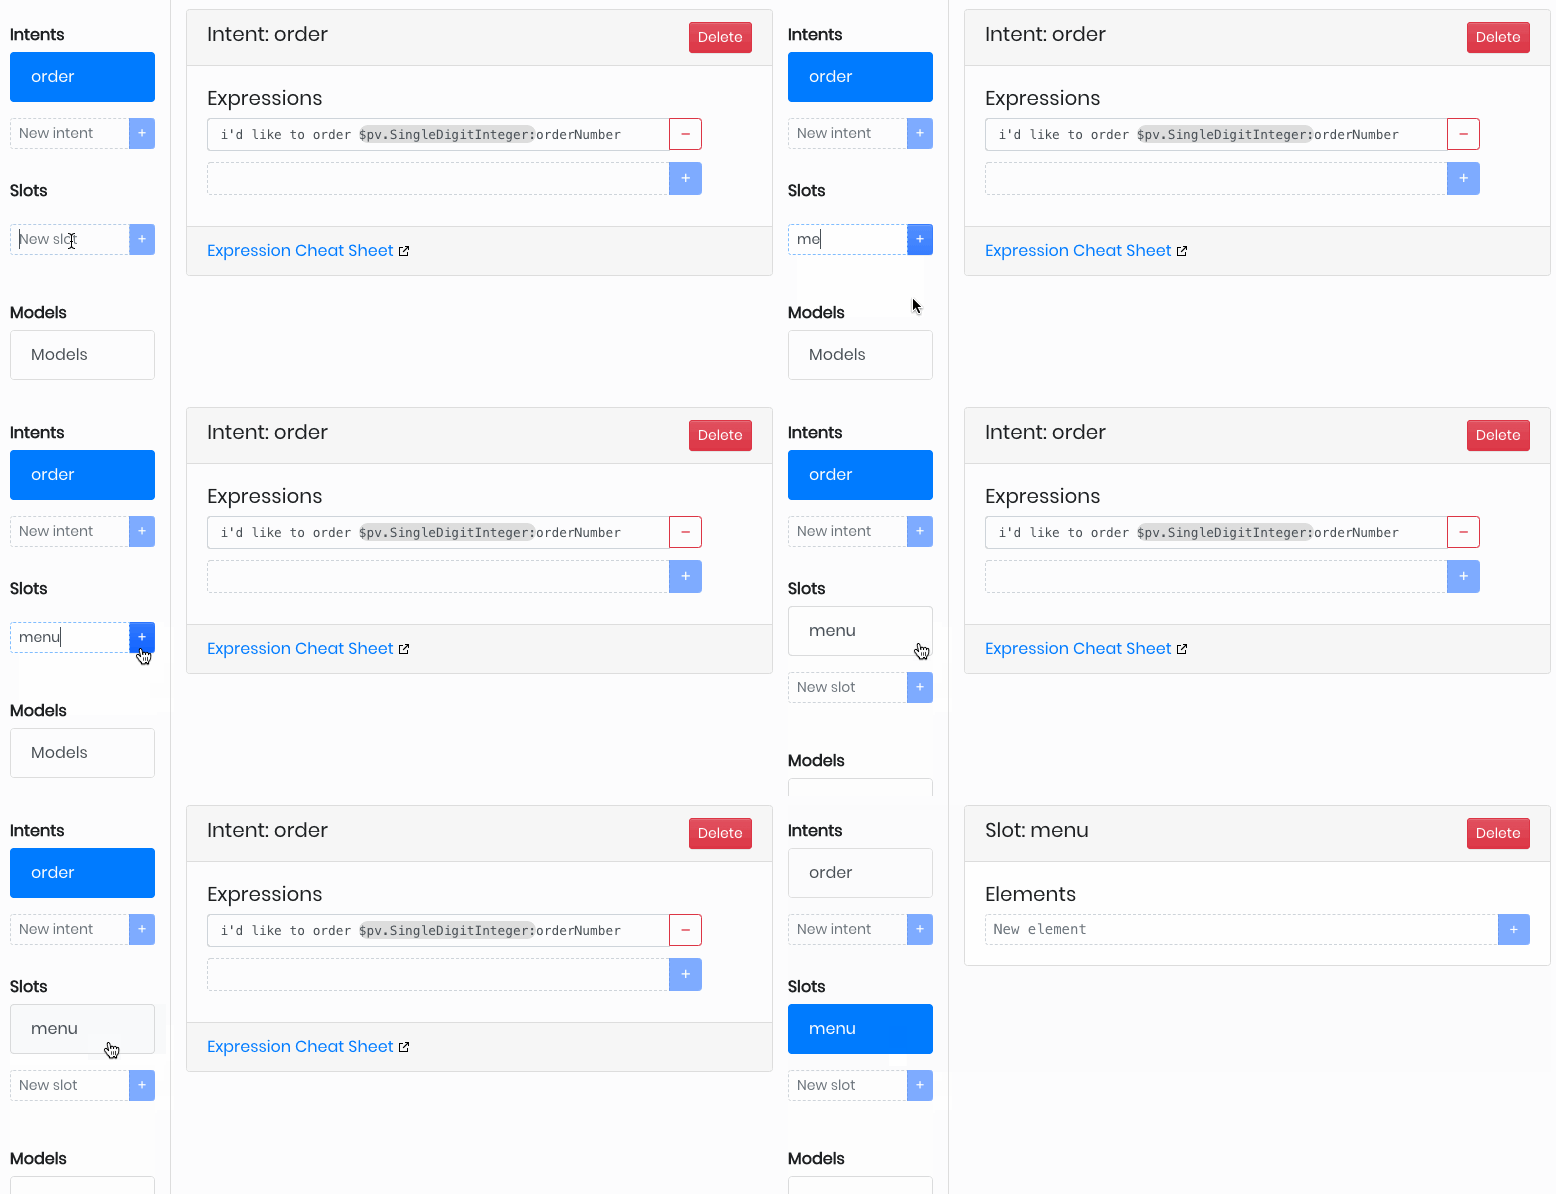
Now we can fill out a list of phrases within the slot. For this slot, that means phrases that represent all of the items a customer can order.
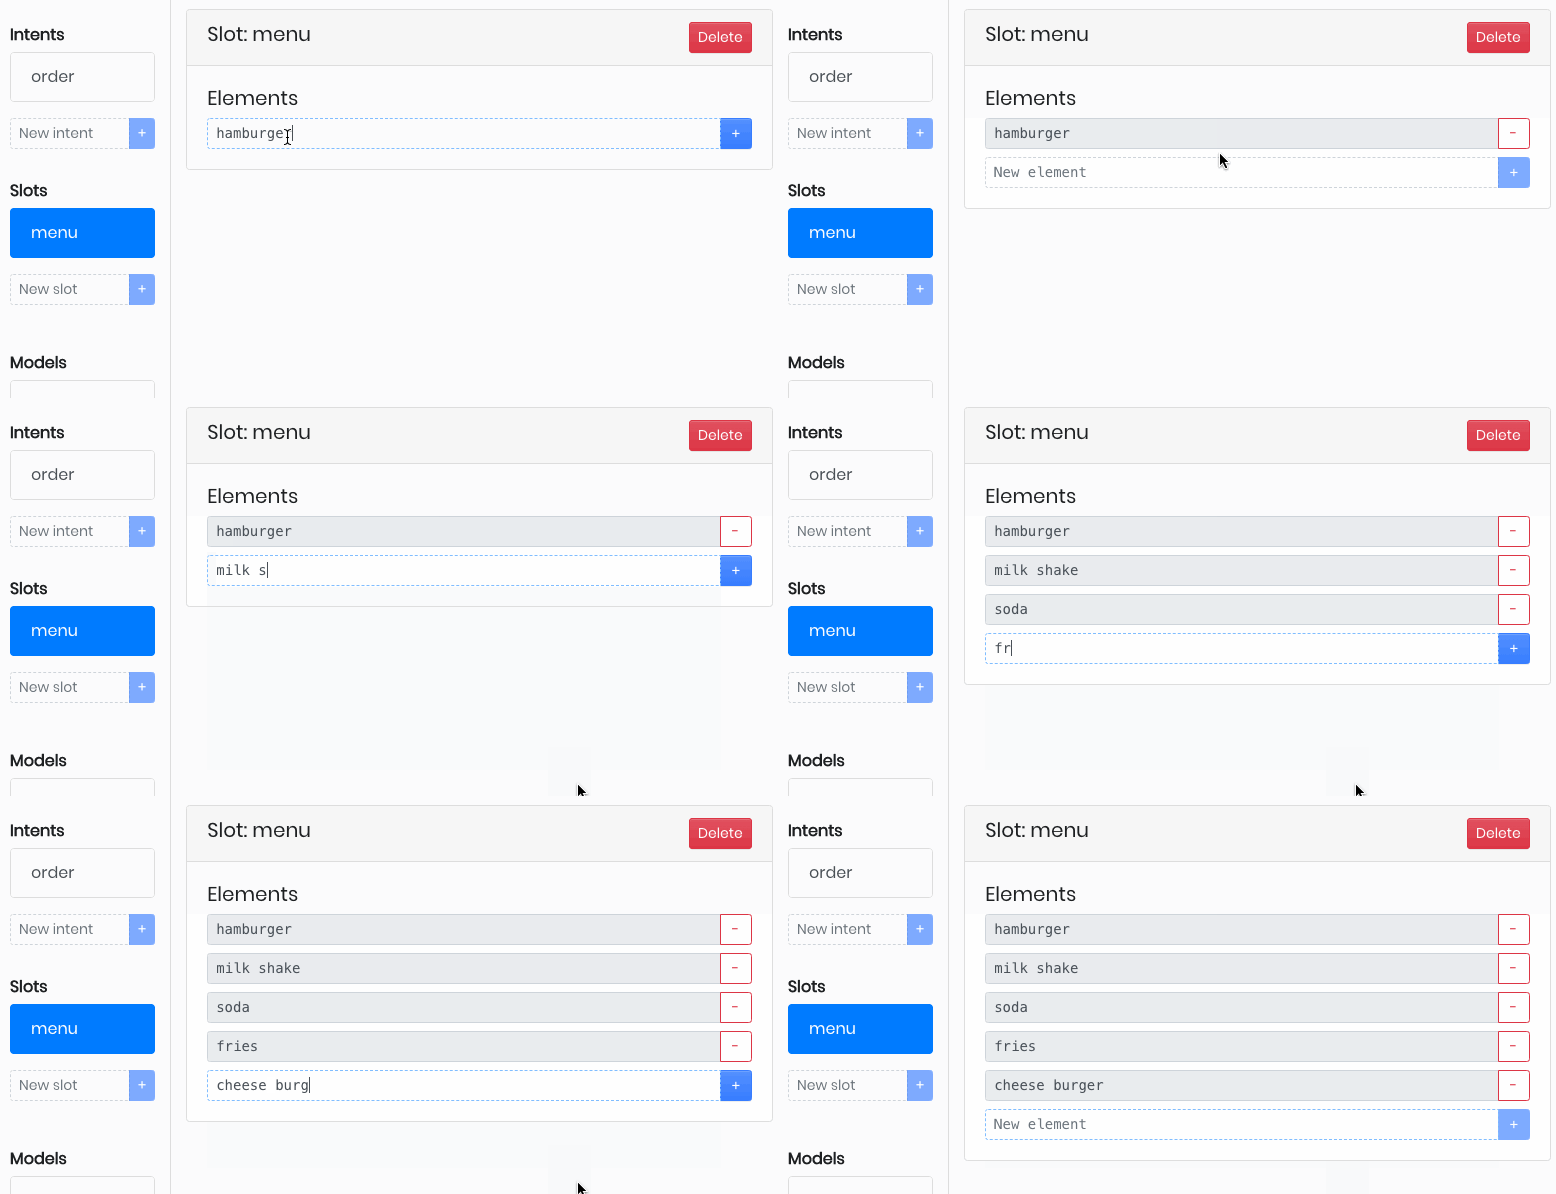
Add the following phrases to the 'menu' slot by typing them in and pressing enter (or clicking the ‘+’ button):
- Hamburger
- Milk shake
- Soda
- Fries
- Cheese burger
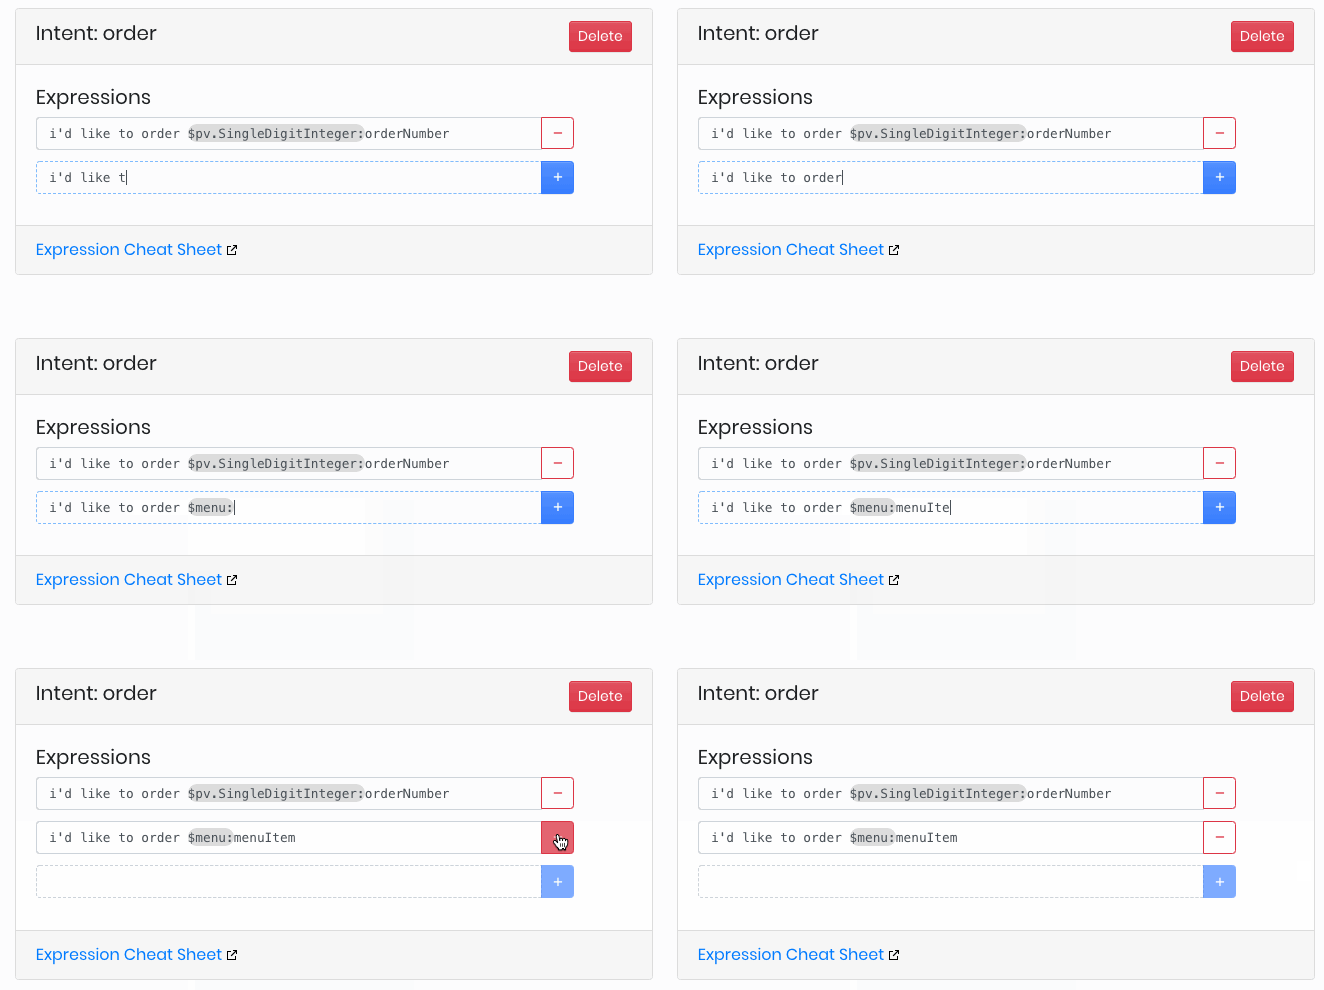
Create a new expression in the order intent by typing "I’d like to order a $menu:menuItem" into the dotted box at the bottom of the expression list and pressing enter (or clicking ‘+’), as before.
This is the same as the other expression, except we are using our own slot.
Click the microphone icon, wait for it to prompt you, then say: “I’d like to order a hamburger”.

As before, we can see the specific value extracted from the utterance. This time, it’s our own custom slot value that we defined. Ordering by number will also continue to work.
Training the context
Once you’re happy with the context, you may submit the context to be trained. The resulting model file can then be used with the Picovoice/Rhino SDKs.
Click the “Train” button in the bottom right corner of the Console. This will open a window that prompts you to select the desired target platform. This allows the system to apply platform- and architecture-specific optimizations at the time of training.
Select the target platform from the dropdown menu, ensure you’ve read, understood, and accept the terms of use, then click “Train”.

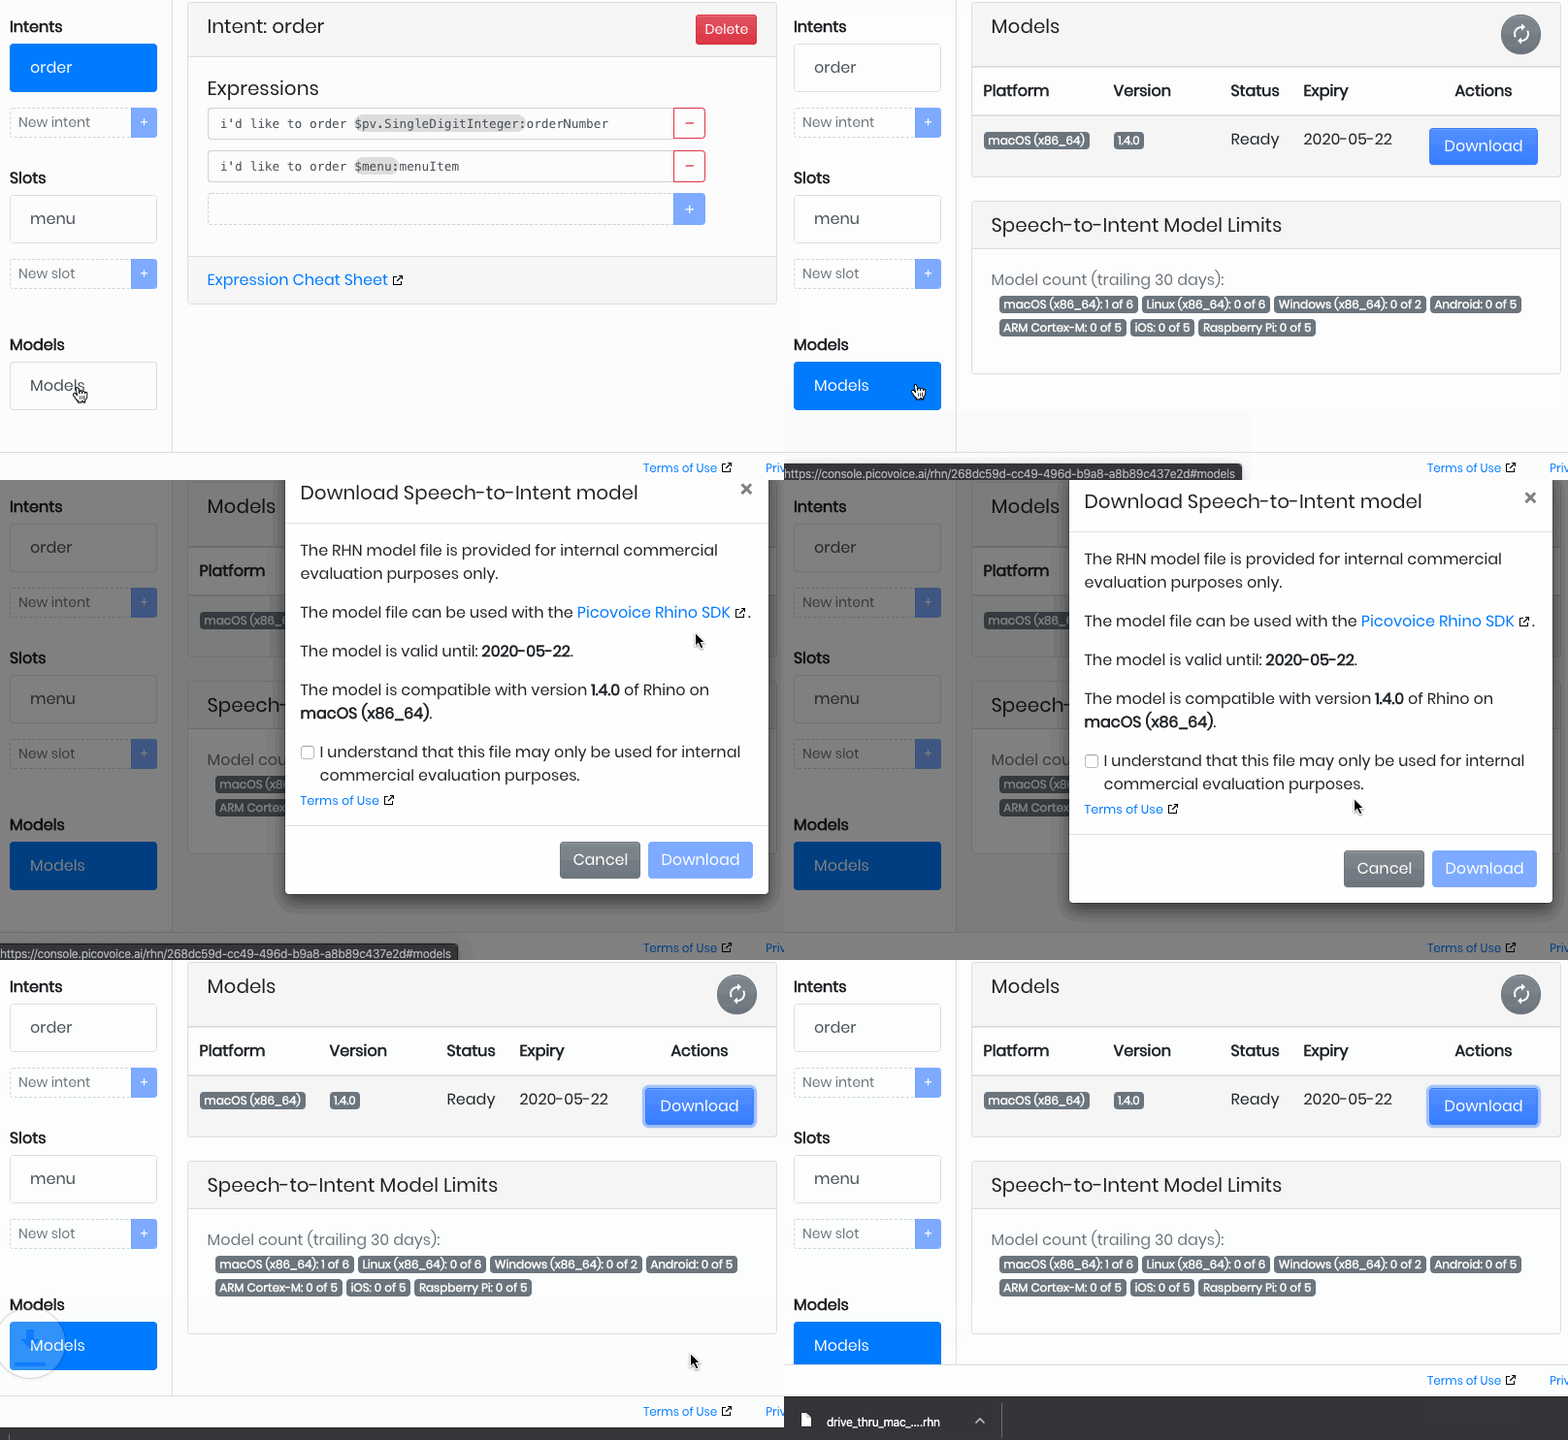
When processing is complete in approximately 1-3 hours, the resulting model file will be available for download. Click “models” on the left pane in the console to see the status of training and to download.
When it’s ready, download the model file.
What's next?
From here there’s many directions we can go to enhance the context. Here are some suggestions:
Expand the menu to more items
Add more expressions to the order intent so that it accommodates different ways of saying the order
- Utilize the speech-to-intent expression syntax to make those permutations succinct and avoid repetition
- e.g.:
[I want to order, I'd like to order, I'll order] (a) $menu:menuItem (please)
Add a new intent called “changeOrder” so that customers can add or remove items
Use multiple slots to capture additional variables
- e.g.: “I’d like a cheese burger with no pickles”
- e.g.: “I’d like two hamburgers”